Bike repair tools for home maintenance without overbuying
The practical starting point
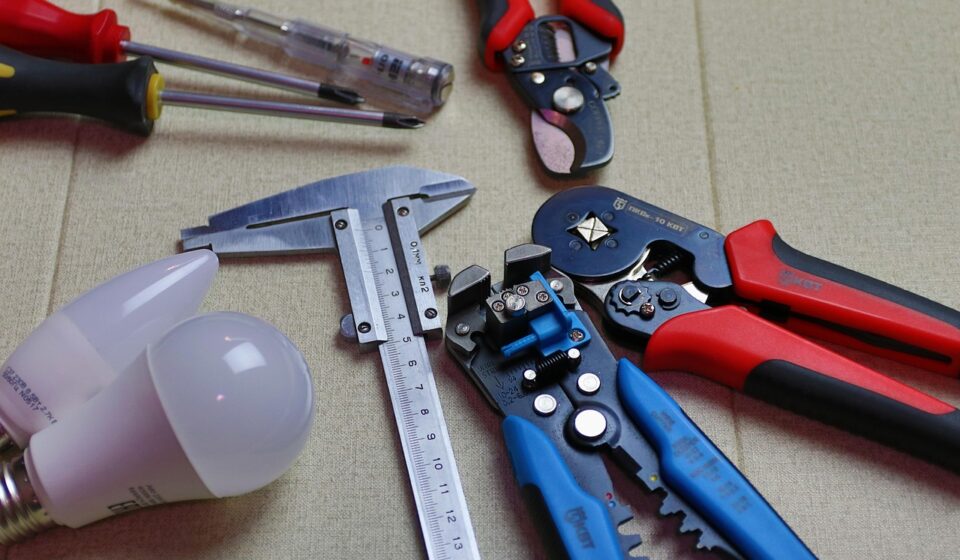
The right bike repair tools are not the biggest boxed set on the shelf. They are the tools that match the repairs you actually plan to do: fixing flats, adjusting saddle and cockpit position, cleaning and lubricating the drivetrain, replacing a chain, tuning cable-operated brakes and derailleurs, and checking common bolts to the correct torque. For most riders, a sensible home setup starts with good metric hex keys, tire tools, a floor pump with gauge, a chain wear checker, a torque wrench for sensitive fasteners, and a small number of drivetrain- and brake-specific tools. More specialized tools should come later, after you have identified the exact hub, bottom bracket, cassette, brake and e-bike systems on your bicycle.
This task-based approach is especially useful for buyers comparing tool kits in the Tools and Accessories category. Many bicycle standards look similar at a glance but require different fittings in practice.
Build the kit around repairs, not around tool count
Preassembled bike tool kits can be convenient, but they often include pieces that do not fit your bike while missing the one tool your component actually needs. A more reliable method is to list the jobs you want to handle at home, then buy the correct tool for each job. Public service guidance from Park Tool makes a similar distinction: a seat-bag kit for roadside use and a home kit for workshop use should be treated as two different sets of tools.
The U.S. Consumer Product Safety Commission’s bicycle rules at 16 CFR Part 1512 also provide a useful maintenance framework. Bicycle manuals must cover areas such as brakes, control cables, bearing adjustments, wheel adjustments, lubrication, reflectors, tires, and handlebar and seat adjustments. That list is not a shopping list, but it does show which maintenance areas have safety relevance and should not be treated as cosmetic details.
Before buying, write down these details from your own bike:
- Brake type, such as rim brake, mechanical disc brake or hydraulic disc brake.
- Drivetrain speed, because chains, quick links and cassette tools vary.
- Axle type, such as quick release, thru axle or solid axle.
- Bottom bracket type, if you plan to remove cranks or service the bottom bracket.
- Fastener types, usually metric hex, T25 Torx or a mix of both.
- Frame and handlebar material, especially if any clamped area is carbon fiber.
Core tools most home mechanics will use often
These tools cover the highest-frequency jobs for commuters, recreational riders and many road, gravel and mountain bike owners. They are also the tools most likely to remain useful when you change bikes.
| Maintenance job | Useful tools | Why it matters |
|---|---|---|
| Fixing flats | Tire levers, spare tube or patch kit, floor pump with gauge, portable pump or CO2 inflator | Flat repair is the most common roadside task, and correct pressure helps reduce pinch flats and poor handling. |
| Adjusting common bolts | Metric hex key set, T25 Torx key, small screwdriver set | Most stems, seatposts, bottle cages, derailleurs and brake parts use these fasteners. |
| Protecting sensitive parts | Torque wrench with suitable bits | Manufacturer torque values help prevent loose parts and overtightening damage, especially on carbon components. |
| Chain inspection and replacement | Chain wear checker, chain tool, master link pliers | Replacing a worn chain on time can reduce wear on cassettes and chainrings. |
| Pedal and wheel tasks | Pedal wrench or correct hex key, spoke wrench matched to nipples | Pedals and minor spoke tension corrections require secure, well-fitting tools. |
| Cleaning and lubrication | Brushes, rags, degreaser, chain lubricant, nitrile gloves | Clean drivetrains shift better and make wear easier to inspect. |
A torque wrench deserves special attention. Shimano dealer manuals, for example, repeatedly instruct mechanics to check torque values and verify appropriate tightening torque with the bicycle, frame or handlebar manufacturer when installing parts on carbon surfaces. The practical lesson is straightforward: do not rely on feel when clamping carbon handlebars, seatposts, stems or lightweight components.
Roadside tools are different from bench tools
A ride kit should solve a problem quickly enough to get home. It does not need to duplicate your workbench. Keep it small, reliable and specific to the bike you are riding that day.
A practical roadside kit usually includes:
- A compact multitool with the hex and Torx sizes found on your bike.
- Two strong tire levers.
- A spare tube, even if you ride tubeless.
- A patch kit or tubeless plug kit, depending on tire setup.
- A mini pump or CO2 inflator, plus the correct valve compatibility.
- A quick link that matches your chain speed.
- A small chain tool if your multitool does not include one.
Do not overload a saddle bag with tools for jobs you would never attempt at the roadside. Cassette removal, hydraulic brake bleeding, bottom bracket work and headset bearing service are bench repairs. For those jobs, stability, lighting, cleaning space and component-specific instructions matter more than portability.
When to add specialty bike repair tools
Specialty tools become worthwhile when they match a repeated task or a component standard you can clearly identify. Buying them too early is one of the easiest ways to waste money.
Drivetrain tools
If you replace chains and cassettes, you may need a cassette lockring tool, chain whip and possibly a crank or bottom bracket tool. The exact tool depends on the cassette system and bottom bracket interface. A 12-speed chain, an older 8-speed chain and an e-bike-rated chain may have different joining requirements, so the chain tool and quick link must match the chain manufacturer’s guidance.
Brake tools
Cable-operated rim and disc brakes can often be adjusted with hex keys, cable cutters and a torque wrench. Replacing cables and housing requires a proper cable cutter, not a general household cutter that crushes housing ends. Hydraulic disc brakes are different. Basic pad replacement and rotor inspection may be reasonable for careful home mechanics, but bleeding requires the correct bleed kit, fluid type and procedure for the brake brand. Mineral oil and DOT fluid systems are not interchangeable.
Wheel and tire tools
A spoke wrench is useful only if it fits the spoke nipples correctly. Poor fit can round nipples and make a simple correction harder. A rotor truing fork can help with minor disc rotor rub, while a truing stand becomes more reasonable for riders who frequently maintain multiple wheels. Tubeless riders may also need valve core tools, sealant syringes and tire seating aids, but these are not necessary for every bicycle.
Bottom bracket, headset and suspension tools
These areas are where home repair can become expensive and standard-specific. Bottom bracket sockets, bearing presses, crown race tools and suspension service tools should be purchased only after checking the exact component model and service documentation. For many casual riders, paying a qualified shop for occasional bearing or suspension work is cheaper and safer than buying tools that may fit only one bike. See also: Buying Guides.
Safety limits for home repairs
A good tool list should also make clear when not to use the tool. Bicycles may look simple, but brakes, steering, wheels and e-bike electrical systems are safety-critical. The ISO public catalogue lists the ISO 4210:2023 bicycle safety series across areas such as braking, steering, frames, forks, wheels, drive systems, saddles and seat posts. Those standards are written for design and testing, not home repair, but they reinforce the point that these assemblies affect rider safety.
Use extra caution in these cases:
- Brake uncertainty: If a brake lever pulls to the bar, hydraulic fluid leaks, pads are contaminated or braking power is inconsistent, stop riding until the system is correctly serviced.
- Carbon components: Use the manufacturer’s torque value, inspect clamping surfaces and do not assume tighter is safer.
- Steering play: A loose headset, slipping stem or damaged steerer tube should be treated as a serious issue.
- Cracked or dented parts: Do not try to repair structural frame, fork, handlebar or rim damage with ordinary hand tools.
- E-bike electrical systems: Follow the manufacturer’s instructions for battery and charger handling. CPSC and UL safety materials advise using supplied or approved chargers and avoiding damaged batteries. Motor, battery and wiring repairs are not normal home bike repairs.
For partially assembled bicycles, the CPSC rules also require tool information for proper assembly and adjustment on certain packaging or display material. That is a reminder to treat final assembly as more than attaching a wheel and straightening the bars. Brakes, reflectors, steering, wheel retention, saddle height and torque checks all matter before the first ride.
A simple buying sequence
If you are starting from zero, buy in stages. This keeps the kit useful and helps avoid a drawer full of near-duplicate tools.
- First stage: Floor pump with gauge, tire levers, spare tubes or patch supplies, metric hex keys, T25 Torx, screwdrivers, chain lubricant and cleaning supplies.
- Second stage: Torque wrench, chain wear checker, chain tool, master link pliers, pedal wrench or the correct pedal hex key.
- Third stage: Cable cutter, brake pad tools, cassette lockring tool, chain whip and spoke wrench if your bike and maintenance plan justify them.
- Fourth stage: Repair stand, bleed kit, bottom bracket tools, bearing tools, truing stand or suspension tools only after confirming exact compatibility.
Tool quality matters most where fit and leverage are critical. Hex keys, Torx keys, cable cutters, torque tools and bottom bracket tools should be accurate and durable. Cheap versions of these tools can round bolts, crush cables or slip under load. For low-risk accessories such as brushes, trays and storage, the difference is less critical.
Frequently asked questions
What bike repair tools should a beginner buy first?
Start with tools for flats, cleaning and basic adjustments: tire levers, a spare tube or patch kit, a floor pump with gauge, metric hex keys, a T25 Torx key, screwdrivers, chain lubricant and rags. Add a torque wrench early if your bike has carbon parts or lightweight cockpit components.
Do I need a repair stand?
A stand is not required for every repair, but it makes cleaning, drivetrain work, brake adjustment and wheel inspection much easier. If you maintain several bikes or work on your bike monthly, a stable repair stand is usually more useful than buying rare specialty tools first.
Are universal bike tool kits worth buying?
They can be worthwhile if the included tools match your bike. The risk is paying for bottom bracket, freewheel, cone wrench or crank tools that do not fit your components. Check your bike’s exact standards before choosing a kit.
Can I service hydraulic disc brakes at home?
Some tasks, such as pad replacement and rotor cleaning, may be suitable for careful home mechanics. Bleeding hydraulic brakes requires the correct bleed kit, correct fluid and brand-specific steps. If braking performance is uncertain, use a qualified mechanic.
What tools should I carry on every ride?
Carry a compact multitool that fits your bolts, tire levers, inflation, a tube or tubeless repair option, and a quick link that matches your chain. The goal is not full repair capability; it is getting home safely.
Bottom line
The most useful bike repair tools are selected by task, not by the size of the box. Start with flat repair, clean adjustment and torque-safe basics. Add drivetrain, brake, wheel and bearing tools only when your bike’s exact standards justify them. That approach gives home mechanics a safer, cleaner and more cost-effective kit while leaving highly specialized or safety-critical work to trained service providers when appropriate.