How Do You Choose Crimp Tools That Make Reliable Wire Connections?
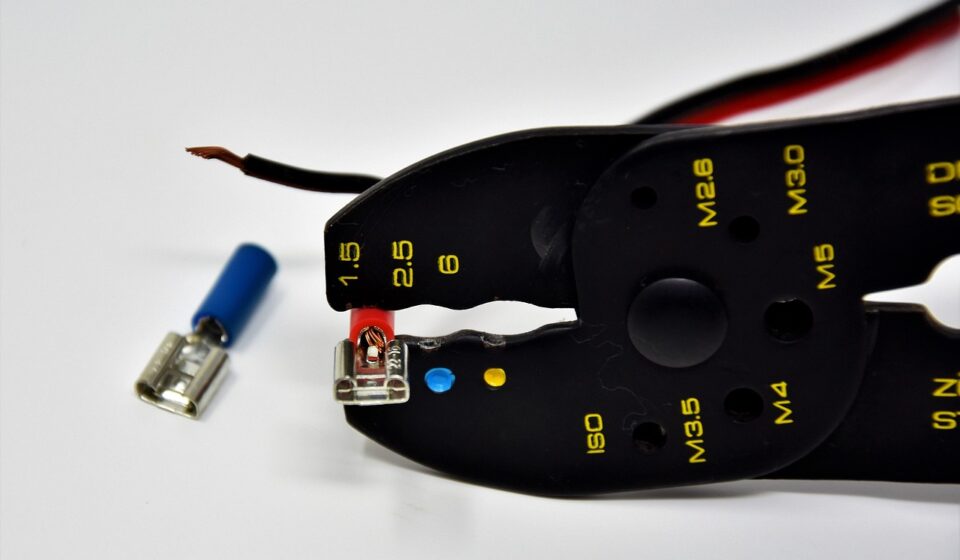
What Do Crimp Tools Actually Need to Do?
Choosing crimp tools is not just about filling a tool box. It affects wire holding strength, electrical contact, repair time, and in some jobs, safety. If you buy for maintenance, bench assembly, or resale, start with the wire and terminal you really need to connect. You can also check related hand tools and accessories in the Tools and Accessories category when you are putting together a practical tool set.
A Firm Mechanical Grip
A proper crimp presses the terminal barrel around the conductor so the wire stays in place during pulling, bending, and vibration. If it is too loose, the wire can work its way out after a few service cycles. If it is too tight, the barrel may cut into the strands. On a trailer harness, that kind of small error can show up later as a lamp that blinks after a rough road.
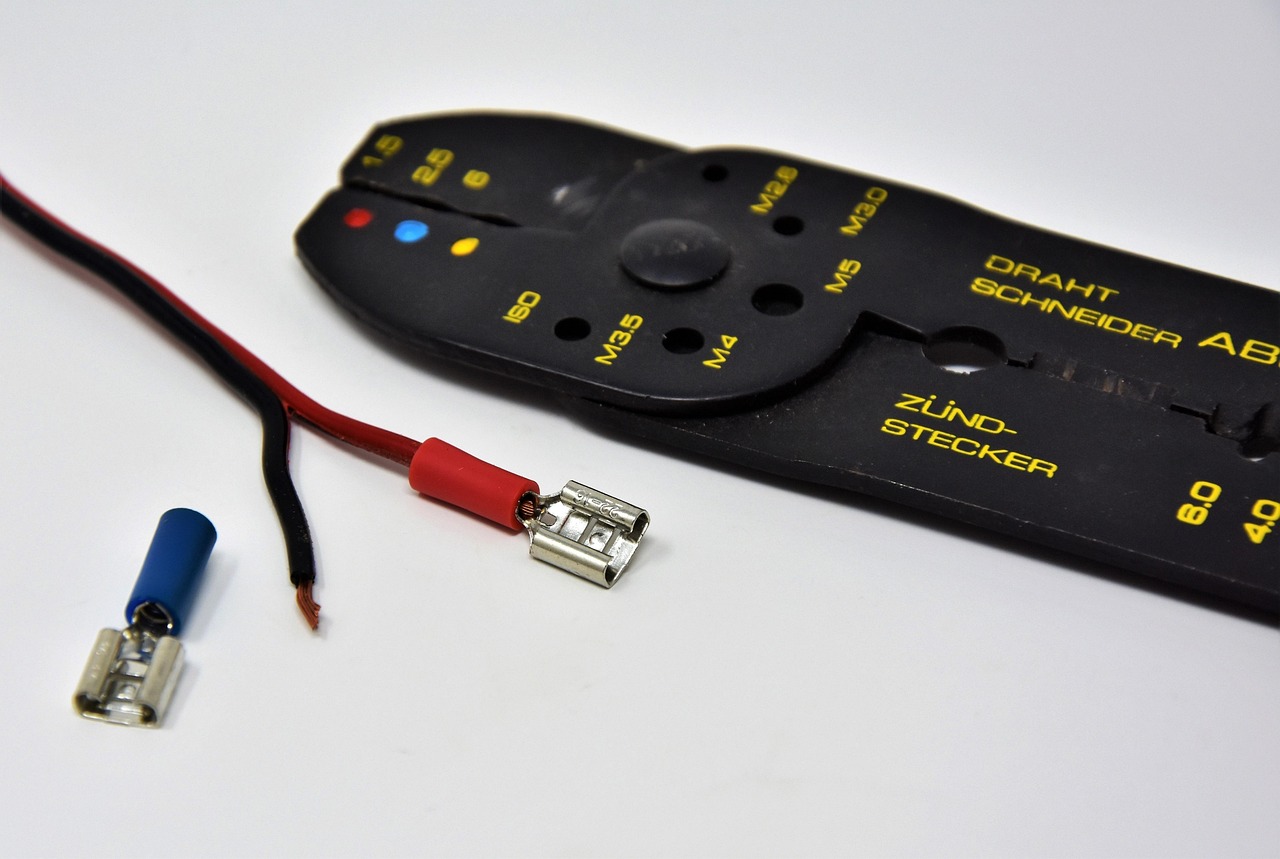
A Low-Resistance Electrical Path
The crimp also needs to give a steady metal-to-metal contact path. Heat is usually the first warning when resistance starts to rise. NFPA Research reported in February 2022 that U.S. fire departments responded to an estimated yearly average of 32,620 home fires involving electrical distribution and lighting equipment in 2015 to 2019, with wiring and related equipment involved in 68 percent of those fires. That report does not say crimping is the only cause, but it is a clear reminder that electrical connections need proper attention. (content.nfpa.org)
Repeatable Force and Shape
One good crimp does not mean much if the next ten come out different. A ratchet mechanism, the correct die, and steady handle force help keep each connection close to the same shape. This is where low-cost plier-style crimpers often fall short. They may work for a field repair, but they depend a lot on hand feel, and that changes from one worker to another.
Why Does Matching the Terminal Matter So Much?
Crimping works as a matched system. The wire, terminal, die cavity, and tool frame all need to fit the same job. If one part is wrong, the finished crimp may look fine outside, while the conductor inside is loose, crushed, or sitting in the wrong section of the barrel.
Wire Gauge and Terminal Range
Start with the conductor size. AWG markings, metric square millimeters, insulation thickness, and stranded or solid construction all matter. A red, blue, or yellow insulated terminal gives a quick size hint, but the color is not a full specification. Read the terminal range before you set the die, and for mixed repair kits, keep a simple chart near the bench.
Die Profile and Barrel Style
Open-barrel terminals, closed-barrel insulated terminals, bootlace ferrules, coax connectors, and copper lugs need different die shapes. A hex die may be right for some lugs, while a square or trapezoid die may be better for ferrules. The 2024 UL 1976 outline, as listed by ANSI, covers crimp tools evaluated with specified connecting devices such as quick-connect terminals, wire connectors, ferrules, and grounding or bonding equipment. That kind of matching matters because the die shape is part of the connection, not just an accessory. (webstore.ansi.org)
Insulation Grip and Strain Relief
Many terminals have two crimp zones: one for the conductor and one for insulation support. The conductor crimp carries current, and the insulation crimp helps reduce bending stress. If the strip length is too short, insulation gets caught in the conductor crimp. If it is too long, bare wire sticks out, and neither result belongs in clean assembly work.
How Can You Judge Crimp Quality Before a Job Leaves the Bench?
You do not need a laboratory for every small job, but you do need a check that can be repeated. Visual inspection, basic pull checks, and measured crimp height are simple shop habits. They catch many faults before the cable is packed, installed, or sent to the customer.
Crimp Height, Bellmouth, and Conductor Brush
Molex explains in its Quality Crimp Handbook that tooling setup affects crimp height, conductor brush, bellmouth, cut-off tab, strip length, and insulation position, and variation in these items can reduce measured pull force. In normal bench language, the crimp must sit in the right place, the wire strands must show where they should, and the barrel must not be crushed flat like a coin. These points are easy to check once operators know what they are looking for. (molex.com)
Pull Testing for Production Confidence
A hand tug is useful for a quick repair, but it is not the same as a pull-force test. Production work needs a gauge and the terminal maker’s required value. Do not yank the wire like you are starting a lawn mower. Pull in line with the wire, write down the result, and check again after die changes or a new terminal batch.
Clean Cuts, Strip Length, and Strand Control
Bad stripping can ruin good crimp tools. Nicked strands reduce conductor area, and twisted strands can bunch up before the barrel forms. A clean strip, straight wire entry, and no loose whiskers make the die’s job much easier. It is not exciting work, but many failed crimps start right there.
Which Crimp Tools Fit Trade, Workshop, and OEM Work?
The right tool depends on volume, cable size, and terminal family. A technician repairing control panels does not need the same setup as a shop building harnesses all day. The best buy is not always the most expensive tool. It is the tool that fits the job and does not slow the worker down.
Ratchet Hand Tools for Daily Bench Work
Ratchet hand crimpers are a practical choice for common insulated terminals, ferrules, and small connector pins. The ratchet helps complete the stroke before release, so the crimp is less likely to be left half-made. Choose handles that fit the operator’s hand. After 200 crimps in a shift, grip comfort is no longer a small thing.
Interchangeable Dies for Mixed Terminal Inventory
Interchangeable-die crimpers make sense when you handle several terminal styles in low to medium volume. Keep each die marked, and store it with the terminal type it is used for. The common mistake is buying one large die kit and guessing the cavities later. Guessing may save a few seconds, but it can turn into an afternoon of rework.
Hydraulic and Battery Tools for Large Cable Lugs
Large copper lugs, battery cables, grounding conductors, and distribution work often need hydraulic or battery crimpers. These tools give the force needed for thick lugs and large conductors. Match the die code to the lug maker’s instruction before crimping. A deep hex mark may look strong, but appearance alone does not prove the crimp is correct.
What Safety and Compliance Points Should You Check?
Crimp tools sit in the same safety area as other hand and power tools. Poor maintenance, wrong accessories, and live-circuit shortcuts can turn a simple termination task into a site problem. A short checklist keeps the work steady, especially when several people share the same tool drawer. See also: Fasteners.
Safe Tool Condition on Every Shift
OSHA 29 CFR 1926.300(a) states that hand and power tools, whether supplied by the employer or employee, must be kept in safe condition. For crimpers, that means no cracked handles, bent jaws, loose pins, dirty dies, or ratchets that release early. If the tool feels gritty, loose, or uneven, stop and check it before making more terminations. This is basic maintenance, but it prevents many repeat faults. (osha.gov)
Industry Standards for Harness Work
For cable and wire harness assembly, IPC released IPC/WHMA-A-620E in December 2022 as requirements and acceptance guidance for cable and wire harness assemblies, including crimped, mechanically secured, and soldered interconnections. Buyers serving OEM, automotive, appliance, or control cabinet markets should ask which acceptance class or customer specification applies before choosing tools. The answer can change the tool, die, inspection method, and record needed for the order. (ipc.org)
No Shortcuts on Live Circuits
Crimping should be done on de-energized conductors unless the procedure and safety controls clearly allow otherwise. Remove power, verify it, and keep metal scraps away from panels. Also do not assume low voltage is harmless, because low voltage can still carry high current. A 12 V battery cable can make a tool jaw very hot very fast.
How Should You Buy and Care for Crimp Tools?
Good buying is partly technical and partly practical. You need tools that workers can use correctly, not just tools that look good in a catalog. The package should match your terminals, but the handle, markings, storage, and spare dies matter too. A tidy tool area saves more time than many shops expect.
Start with Real Wire and Terminal Samples
Before ordering, list the wire sizes, insulation types, terminal brands, and expected monthly volume. If possible, test the crimper on real samples instead of only checking catalog numbers. For export buyers, ask for clear die markings, operating instructions, and packing that protects the jaw alignment during shipping. These details make receiving inspection and later repeat orders much easier.
Keep Dies Marked, Clean, and Stored
Dust, plating flakes, and small pieces of insulation can sit inside die cavities. Wipe dies often and store them dry. Do not throw them loose in a drawer with drill bits and screws, because polished forming surfaces can get nicked that way. A simple labeled box is low cost and works well.
Build a Simple Crimp Record
A short record helps trace problems when a customer asks questions or a batch fails inspection. It does not need special software. For each tool candidate or production station, write down:
- Tool model, die code, and terminal type
- Wire gauge, strip length, and insulation style
- Crimp height or pull-test result when required
- Operator, date, and any adjustment made
This small habit makes repeat orders easier and gives your customer more confidence when a harness, panel, or repair kit has to meet a clear standard.
FAQ
Q1: What are the best crimp tools for general electrical repair? A: A ratchet crimper with matched dies for insulated terminals and ferrules is a good starting point. Add a lug crimper only when you handle larger battery, ground, or power cables.
Q2: Can one crimp tool handle every terminal? A: No. Many tools cover a useful range, but open-barrel pins, closed-barrel terminals, ferrules, coax connectors, and heavy lugs need different die shapes and force levels.
Q3: How tight should a crimp be? A: Tight enough to meet the terminal maker’s crimp height or pull-force requirement, but not so tight that strands break or the barrel cracks. Visual checks alone are not enough for production work.
Q4: Are cheap crimp tools always bad? A: Not always. A budget tool can work for light repair if it matches the terminal and makes consistent crimps. For repeat production, certified or manufacturer-matched tooling is safer and easier to control.
Q5: When should crimp dies be replaced? A: Replace dies when the forming faces are worn, chipped, rusty, or no longer hold the specified crimp height. Also check them after drops, jams, or unexplained pull-test failures.