How to choose leather craft tools for cutting, stitching, and finishing
What leather craft tools should a beginner buy first?
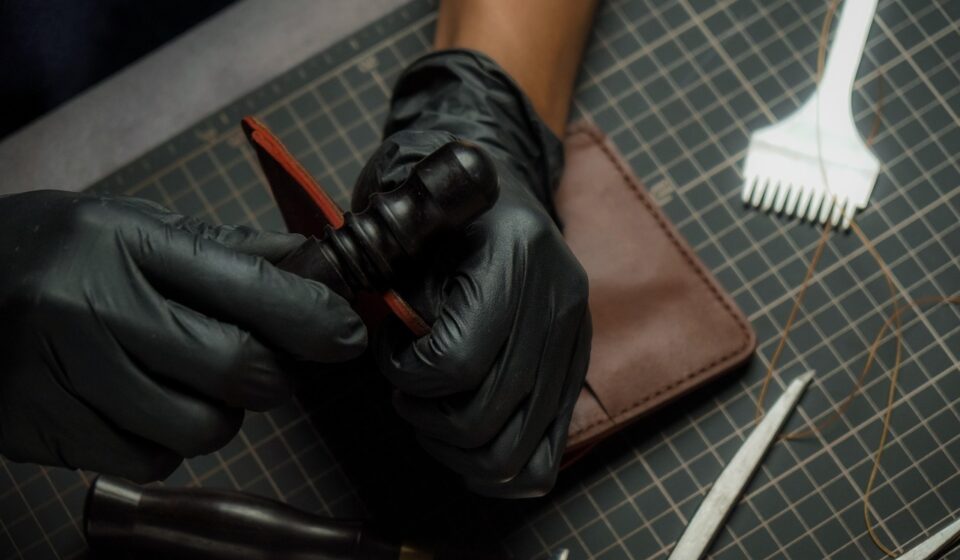
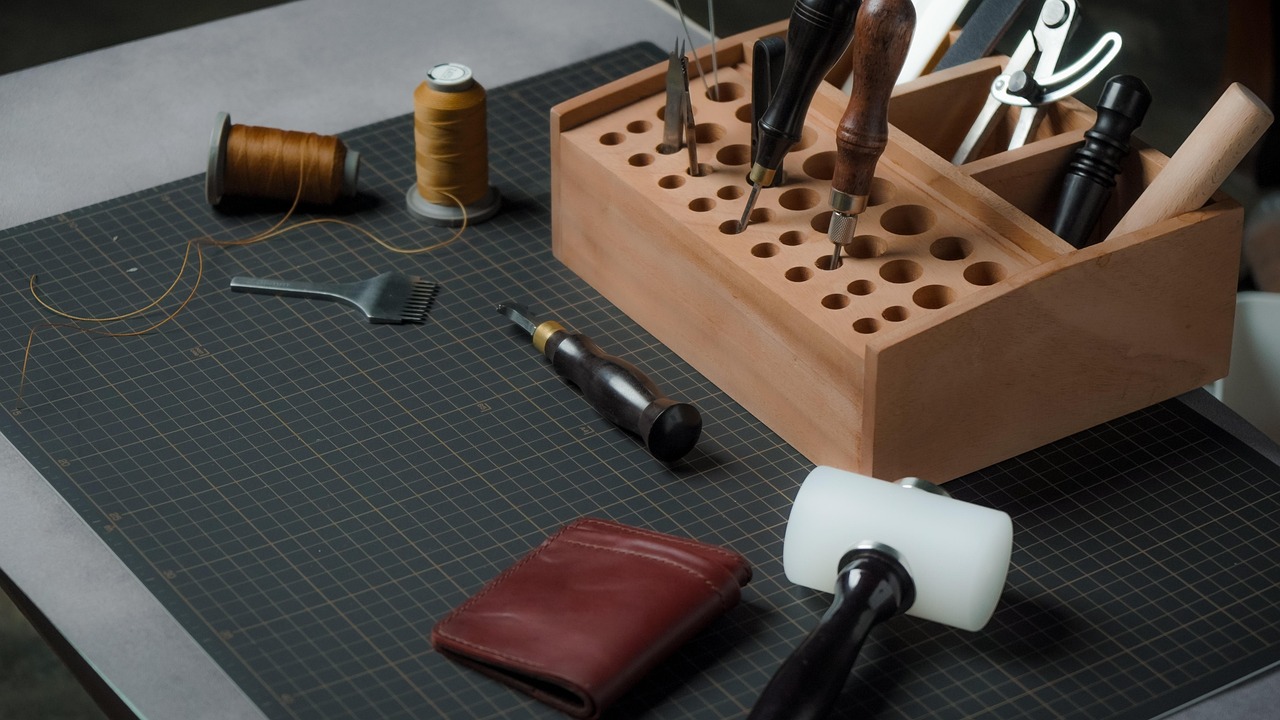
The right leather craft tools depend on the products you plan to make, but most beginners should start with a compact set that cuts accurately, marks repeatably, punches clean holes, and finishes edges safely. A practical first kit includes a sharp knife or rotary cutter, steel ruler, cutting mat, scratch awl, stitching chisels or pricking irons, needles, thread, edge beveler, burnisher, mallet, and a few basic punches. With these tools, a beginner can make wallets, belts, straps, small cases, simple bags, and basic repairs without buying every specialty tool at once.
Leatherwork rewards control more than tool quantity. A cheap blade that will not hold an edge, punches that spread instead of cutting, or a ruler that slips can waste material quickly. For a wider look at hand tools and workshop accessories, see the Tools and Accessories category.
Start with the project, not the tool list
Leather craft covers several types of work, and each one places different demands on tools. A belt maker needs straight cutting, long edge finishing, oblong slots, and strong holes for buckles and rivets. A wallet maker needs precise pattern cutting, thin thread, fine stitching irons, and controlled skiving. A bag maker often needs heavier cutting tools, strap cutters, hardware setters, and tools that can handle curves and layered seams.
Before buying a large kit, define three things: the type of leather, the thickness range, and the joining method. Vegetable-tanned leather is commonly chosen for carving, tooling, belts, and structured goods because it can be stamped and burnished well. Chrome-tanned leather is often softer and more flexible, making it common in bags, upholstery, garments, and softer accessories. Some tools work well on both, but edge finishing, marking, and hole making can behave differently depending on the leather’s firmness and surface finish.
A useful buying rule is simple: purchase tools around operations, not around brand names. Most leather projects must be cut, marked, pierced or punched, joined, and finished. If a tool does not improve one of those operations for the project in front of you, it can wait.
Core leather craft tools and what each one does
A reliable starter setup can be organized into five groups. This structure also helps buyers compare tool kits that look similar online but include very different levels of practical value.
| Tool group | Common tools | Main purpose | What to check before buying |
|---|---|---|---|
| Cutting | Utility knife, round knife, rotary cutter, skiving knife, cutting mat | Cut panels, straps, curves, and thinning areas | Blade quality, handle control, replacement blades, sharpening needs |
| Measuring and marking | Steel ruler, square, wing divider, scratch awl, marking pen | Lay out patterns, stitch lines, holes, and edges | Non-slip ruler backing, clear scale markings, fine marking point |
| Hole making and stitching | Stitching chisels, pricking irons, awl, needles, thread, stitching pony | Create consistent stitch holes and hold work during sewing | Tooth spacing, polished teeth, hole shape, grip comfort |
| Edge finishing | Edge beveler, burnisher, slicker, sandpaper, edge paint applicator | Round, smooth, seal, or color exposed leather edges | Correct beveler size, burnisher groove sizes, finish compatibility |
| Hardware and assembly | Hole punches, rivet setters, snap setters, mallet, anvil or stone slab | Install buckles, snaps, rivets, and other fittings | Hardware size match, setter alignment, impact surface stability |
Cutting tools deserve special attention because almost every later step depends on the first cut. A straight edge that is slightly off, a strap that tapers unintentionally, or a corner cut with a dull blade will be difficult to hide. For many beginners, a sharp utility knife with replaceable blades is more practical than an expensive round knife. A round knife is powerful and efficient, but it requires more sharpening skill and hand control.
Marking tools should provide clear guidance without damaging the visible surface. A scratch awl works well on many firm leathers, but it can leave permanent marks. On softer finished leather, a removable silver pen or a lighter marking method may be safer. Always test marks on scrap from the same hide before marking final parts.
How tool size affects leather thickness and stitch quality
One of the most common beginner mistakes is buying tools without checking size. Leather thickness, thread diameter, stitch spacing, punch diameter, and hardware size must work together. If one element is too large, the finished item can look bulky. If one element is too small, the seam or hardware may not hold reliably.
Leather thickness is often described in ounces in some markets and millimeters in others. As a rough workshop conversion, one ounce of leather thickness is about 0.4 mm. This is an approximation because leather is a natural material and thickness can vary across a hide, but it is useful when matching tools to projects.
| Project type | Typical leather range | Tool considerations |
|---|---|---|
| Card holders and slim wallets | About 0.8-1.5 mm per layer | Fine stitch spacing, sharp skiving tool, small edge beveler |
| Belts and straps | About 3.0-4.5 mm | Strap cutter, sturdy hole punch, larger edge beveler, buckle slot punch |
| Small bags and cases | About 1.5-3.0 mm | Balanced stitch spacing, strap punches, hardware setters |
| Sheaths and heavy utility goods | Often above 3.0 mm | Heavy-duty cutting, strong awl or chisels, solid mallet and anvil surface |
Stitch spacing changes the visual character of the project. Fine goods often use closer spacing, while heavier goods can use wider spacing with thicker thread. Proportion matters. Large holes on thin leather can weaken the seam and look rough; very small holes on thick leather can make hand stitching slow and inconsistent.
Punches and setters also need careful matching. A snap setter made for one cap size may not set another size cleanly. A rivet that is too long may bend or leave a loose joint, while one that is too short may not form a secure head. For hardware work, it is usually best to buy the punch, setter, and hardware from size-compatible ranges rather than mixing parts blindly.
Cutting, punching, and stitching tools compared
Knives and cutters
A utility knife is versatile, affordable, and easy to maintain because blades can be replaced. It is strong for straight cuts and simple shapes. A rotary cutter can be useful for long curves or softer leather, but it may struggle with thick leather or very tight turns. A round knife can cut, trim, and skive efficiently, yet it requires sharpening experience and should not be treated as a first-day necessity.
A skiving knife is used to thin edges, folds, and overlapping areas. Good skiving reduces bulk around seams and helps wallets, straps, and bags look more refined. However, skiving is also one of the easier ways to damage a part. Beginners should practice on scrap leather before thinning final pieces.
Chisels, pricking irons, and awls
Stitching chisels punch through leather and remove or displace material to create holes for sewing. They are approachable for beginners because they create consistent spacing and are easier to use than a traditional awl-only method. Pricking irons are often used to mark or lightly pierce the stitch line, with a diamond awl completing the hole. This method can produce refined hand stitching, but it takes more practice.
Tooth spacing should be selected for the project rather than chosen at random. Closer spacing suits smaller goods, while wider spacing fits heavy leather. The teeth should be polished enough to enter and exit the leather without tearing the surface or getting trapped in the hole. If tools stick badly, wax, polishing, or better technique may help, but low-quality tooth finishing can still be a limiting factor.
Mallets and impact surfaces
Leather tools are often struck rather than pushed. A poly, rawhide, or similar non-metal mallet is commonly preferred because it can drive punches and chisels without mushrooming tool heads as aggressively as a steel hammer. Under the workpiece, use a suitable punch board, cutting surface, or anvil arrangement depending on the operation. A hard stone slab can provide stability for setting hardware, but punching directly into stone will damage tools. See also: Buying Guides.
Finishing tools that change the look of the final piece
Edge finishing is where many handmade leather projects move from rough to deliberate. The correct process depends on the leather. Vegetable-tanned leather edges are often beveled, sanded, moistened or treated, and burnished with a wood or canvas tool. Softer chrome-tanned leather may not burnish in the same way, so makers often use folded edges, edge paint, binding, or other finishing approaches.
An edge beveler removes the sharp corner from a cut edge. Size matters: a large beveler on thin leather can remove too much material, while a small beveler may barely affect heavy leather. Sandpaper or sanding blocks help level layered edges before burnishing or painting. A burnisher then compresses and smooths the edge, but it cannot fully correct uneven cutting or poor glue alignment.
Edge paint tools are useful for modern leather goods, especially where the leather does not burnish cleanly. Edge paint usually requires preparation, thin coats, drying time, sanding between coats, and careful application. A roller pen or fine applicator can help, but patience and surface preparation matter more than the applicator alone.
Quality signals, maintenance, and safety
Leather craft tools do not need to be the most expensive versions available, but they should be accurate enough to repeat results. Look for cutting tools that can be sharpened or use common replacement blades, rulers that do not flex easily, punches with clean edges, and stitching tools with consistent spacing. Handles should feel secure because twisting or slipping under pressure can cause both poor cuts and injuries.
Maintenance is part of tool selection. Knives need sharpening or blade replacement. Punches need clean cutting edges. Stitching chisels may need careful cleaning after contact with waxes, adhesives, or damp leather. Metal tools should be kept dry to limit corrosion, especially in humid workshops. Wooden burnishers and handles should be stored away from excessive moisture and impact damage.
Safety should be treated as a working habit, not an afterthought. Cut away from the body, keep the non-cutting hand out of the blade path, retract or cover blades after use, and use stable surfaces. When using adhesives, dyes, edge paints, or solvents, follow the product label, work with ventilation where required, and avoid open flames around flammable materials. Gloves, eye protection, and dust control may be appropriate for sanding, finishing, and chemical handling.
A practical buying sequence for small workshops
For beginners and small workshops, the smartest path is usually gradual. Start with the minimum tools needed to complete one product cleanly. Then upgrade the tools that directly limit quality, speed, or safety. This avoids the common problem of owning many tools while still lacking one essential size or setter.
- Choose one project type, such as a card holder, belt, strap, or pouch.
- Buy cutting, measuring, and marking tools first because they affect every part.
- Add stitching tools with spacing that matches the project scale.
- Add edge finishing tools suited to the leather type.
- Buy punches and setters only after choosing the exact hardware sizes.
- Upgrade blades, chisels, and punches before buying decorative specialty tools.
Tool kits can be convenient, but review the contents carefully. Some kits include many low-use items while missing reliable knives, proper stitching chisels, or correctly sized hardware setters. A smaller set of dependable tools often produces better work than a large box of inconsistent accessories.
The main takeaway is that leather craft tools should be chosen as a system. Cutting accuracy supports clean edges. Accurate marking supports straight stitching. Correct hole size supports durable seams. Matched setters support secure hardware. When the tools fit the leather and the project, even simple designs can look controlled, durable, and professional.
Frequently asked questions
Can I start leather craft with only a basic tool kit?
Yes, if the kit includes useful core tools rather than only decorative accessories. For small hand-stitched goods, prioritize a sharp knife, ruler, mat, awl, stitching chisels, needles, thread, mallet, edge beveler, and burnisher. Add hardware tools only when the project requires them.
Are expensive leather craft tools necessary?
Not at the beginning. Expensive tools can improve comfort, consistency, and longevity, but the first priority is correct sizing and safe technique. Spend more where precision matters most: blades, punches, stitching tools, and measuring tools.
What is the difference between stitching chisels and pricking irons?
Stitching chisels are commonly used to punch holes through leather for hand sewing. Pricking irons are often used to mark or start holes that are then opened with an awl. In everyday usage, the terms can overlap, so buyers should check the tool’s intended function, tooth geometry, and whether it is designed to punch fully through the leather.
Which tools are most important for clean leather edges?
Clean edges start with accurate cutting and good glue alignment. After that, an edge beveler, sanding block, burnisher, and suitable edge finish or edge paint are the main tools. The best method depends on whether the leather burnishes well or needs a painted or folded edge.